
Most homeowners walk past their hallway endpoints dozens of times each day without giving them a second thought. That blank wall at the end of the corridor? It’s wasted potential. The awkward dead-end space? A missed opportunity. These transitional zones are prime real estate for making visual impact without major construction or costly renovations. A well-designed hallway terminus anchors the space, draws the eye forward, and makes even narrow corridors feel purposeful rather than purely functional. This guide walks through practical, achievable approaches to transform that forgotten wall into a design feature worth the walk.
Key Takeaways
- End of hallway decor ideas transform blank walls into visual focal points that anchor the space and eliminate wasted potential in transitional zones.
- Measure your hallway width (minimum 36 inches clear) before selecting decor—narrow corridors require wall-mounted solutions like mirrors and artwork, while wider hallways can accommodate console tables and plants.
- Large-scale artwork or mirrors at eye level (57-60 inches from floor) create instant impact and require proper mounting anchors rated for weight capacity.
- Layered lighting with wall sconces, picture lights, or uplighting adds drama and dimension beyond standard overhead hallway lighting.
- Architectural elements like board and batten, accent walls, or wainscoting provide depth and character without major construction or floor plan changes.
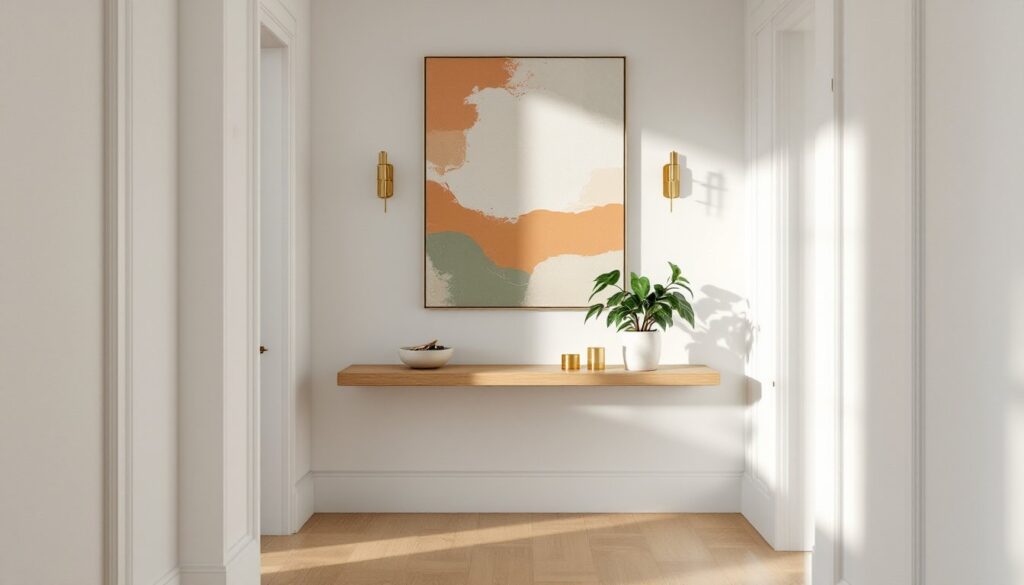
- Plants, storage solutions, and functional pieces like console tables combine aesthetic appeal with practical utility in hallway endpoints.
Why the End of Your Hallway Deserves Design Attention
Hallways function as connective tissue between rooms, but their endpoints often become visual dumping grounds, a place where the broom leans, where paint cans gather, or where nothing exists at all. From a design perspective, this is a fundamental mistake.
The human eye naturally seeks a destination. In a long hallway, that blank wall at the end creates visual tension, a question mark where there should be a period. Decorating this space provides resolution. It transforms a passageway into an experience.
From a practical standpoint, hallway ends rarely have competing demands. Unlike living rooms juggling seating, storage, and entertainment needs, these terminal walls can commit fully to a single purpose: looking good. This makes them ideal testing grounds for bolder choices, dramatic paint colors, oversized art, or architectural experiments that might overwhelm other spaces.
The approach differs based on hallway length and width. A narrow corridor (36″ or less in width) benefits from wall-mounted solutions that don’t intrude on traffic flow. Wider hallways (48″ or more) can accommodate shallow furniture pieces. Measure the clear width, wall to wall, before planning any three-dimensional additions. Standard building codes require minimum 36″ clear width for hallways in residential construction (IRC Section R311.6), though this varies by jurisdiction and whether the hallway serves as egress.
Create a Focal Point with Statement Artwork and Mirrors
Large-Scale Artwork
A single oversized piece commands attention better than a gallery wall in this application. The endpoint wall functions like a frame, it has defined boundaries and a captive viewing angle. A 48″ x 36″ canvas or larger works well for standard 8-foot ceiling heights. For vaulted or tray ceilings, scale up proportionally.
Hang artwork at eye level, typically with the center point 57-60 inches from the floor. Use two D-rings and picture wire rated for the frame weight, anchored into studs when possible. For drywall-only installations, use threaded drywall anchors rated at least double the frame weight. A 30-pound frame needs 60-pound capacity anchors, minimum.
Abstract work or landscapes prevent the “staring eyes following you down the hallway” effect some homeowners dislike with portraiture. Photography, textile art, or framed architectural drawings add texture without color commitment.
Mirror Installations
Mirrors expand narrow hallways visually and bounce available light. A full-length mirror (minimum 48″ tall) serves double duty as a functional last-check station before leaving the house. Leaning a large mirror against the wall works for renters or indecisive decorators, but wall-mounting is safer in homes with children or active pets.
For wall mounting, use mirror clips (top and bottom) or a French cleat system for heavier pieces over 30 pounds. Never use wire hangers alone on mirrors, the weight distribution causes failures. If installing over drywall without stud access, use toggle bolts or snap-toggle anchors.
Angled or beveled mirrors add architectural interest. Sunburst mirrors or geometric multi-panel designs work well in transitional or modern homes. Avoid placing mirrors directly opposite windows at hallway ends unless the goal is to amplify specific outdoor views, otherwise the reflection may create glare issues during certain daylight hours.
Functional and Stylish: Console Tables and Storage Solutions
Narrow Console Tables
A slim console table turns dead-end space into a catch-all for keys, mail, and everyday items. Look for pieces 10-14 inches deep, anything deeper intrudes on walkability. Measure twice: the table plus clearance should leave minimum 36 inches of passable width.
Wall-mounted consoles eliminate floor footprint entirely. Floating shelves with brackets hidden inside the shelf body create the look of a table without legs. Mount these into wall studs using 3-inch wood screws for solid support. Expect each stud-mounted bracket to safely hold 30-40 pounds: span two studs for heavier applications.
For freestanding tables, anchor tall or top-heavy pieces to the wall using furniture straps or L-brackets, especially in earthquake-prone regions or homes with children. This prevents tip-over hazards.
Built-In Storage Niches
If the hallway end wall is non-load-bearing (verify with a professional if unsure), cutting in a shallow niche adds display space without projection. Standard approach: frame an opening between two studs (typically 14.5″ clear width between studs on 16″-on-center framing), add a header and sill, then finish with drywall and trim.
This is not a beginner project. It requires cutting into existing drywall, potentially dealing with electrical wiring or plumbing, and matching drywall texture and paint. Homeowners comfortable with framing and drywall can DIY: others should hire a handyman or carpenter. Always check for wiring with a stud finder with AC detection before cutting.
Finish the niche interior with paint, wallpaper, or the same wall treatment as the surrounding surface. Add LED puck lights or strip lighting at the top for display emphasis.
Lighting Solutions That Add Drama and Dimension
Wall Sconces
Hallways typically rely on overhead lighting, which creates flat illumination. Adding wall sconces at the end wall introduces layered lighting and visual interest. Install sconces 60-72 inches to center from the floor, high enough to avoid head strikes but low enough to wash light across artwork or mirrors.
Hardwired sconces require electrical box installation, which means cutting into drywall and potentially running new wire back to a switch or junction box. This is licensed electrician territory in most jurisdictions unless the homeowner is confident working with household electrical (and local codes permit). Budget $150-400 per sconce for professional installation, depending on access and wire routing complexity.
Plug-in sconces with cord covers offer a no-electrical-work alternative. Route the cord along the baseboard and up the wall inside a paintable cord channel for a cleaner look. These work well for renters or quick updates.
Pair warm-temperature bulbs (2700-3000K) in hallways to avoid the institutional feel of cool white light. Dimmable LEDs add flexibility.
Picture Lights and Uplighting
A battery-operated picture light mounted to the frame top highlights artwork without wiring. For hardwired picture lights, run electrical during other renovation work or hire out.
Uplighting, a small LED fixture tucked behind a console table or plant, casts dramatic shadows upward along the wall. This technique works especially well with textured walls or decorative molding. Small plug-in LED spots run $20-40 and create high impact for low investment.
Bring Life with Plants and Greenery
Floor Plants for Wide Hallways
A large potted plant softens hard architectural lines and adds organic texture. Fiddle-leaf figs, snake plants, or dracaena tolerate indoor conditions and provide vertical interest. Use pots with drainage saucers to protect flooring, water damage to hardwood or carpet from overflow is entirely avoidable.
Consider light levels before committing. Hallways with windows at the endpoint support a wider plant range. Interior hallways with only artificial light require low-light tolerant species. Snake plants and pothos handle low light well: fiddle-leaf figs will decline without bright indirect light.
Secure large planters on tile or hardwood with rubber furniture pads to prevent scratching during cleaning or repositioning.
Wall-Mounted Planters and Hanging Solutions
Vertical planters or wall-mounted pots work in narrow hallways where floor space is unavailable. Mount using the same principles as artwork: find studs, use appropriate anchors, and overrate weight capacity.
Hanging plants from ceiling hooks add dimension but require ceiling joist location. A standard medium-density pothos in a ceramic pot with soil weighs 8-15 pounds when watered, use a joist-mounted hook, not a drywall anchor. Swag hooks screwed directly into joists provide reliable support.
Faux plants are a legitimate option for hallways with poor light or for homeowners who travel frequently. Quality artificial greenery has improved significantly. Look for plants with varied leaf shading and realistic texture, cheap fakes read obviously artificial.
Architectural Elements and Accent Walls
Board and Batten or Wainscoting
Adding board and batten or picture frame molding to the endpoint wall creates architectural depth without altering the floor plan. This is a weekend DIY project for homeowners comfortable with a miter saw and nail gun.
Use 1×4 or 1×6 pine boards (actual dimensions 3/4″ x 3.5″ or 3/4″ x 5.5″) cut to height and spaced evenly. Attach directly to drywall using construction adhesive and 18-gauge brad nails. Fill nail holes with paintable wood filler, caulk seams, then prime and paint.
Plan the layout on paper first. Centered, symmetrical spacing looks more intentional than random placement. For an 8-foot-wide wall, five vertical boards with equal spacing reads clean and balanced.
Accent Paint and Wallpaper
Painting only the end wall in a bold color creates instant focus. Darker tones (navy, charcoal, deep green) add drama: lighter accent colors maintain brightness while still differentiating the space. Use satin or eggshell finish for easier cleaning in high-traffic areas.
Wallpaper offers pattern and texture that paint can’t match. Peel-and-stick wallpaper simplifies installation and removal, ideal for renters or commitment-phobes. Traditional paste wallpaper provides more pattern options but requires more skill to install without bubbles or misalignment.
Prep is everything: fill holes, sand smooth, and prime bare drywall before wallpaper application. Skipping primer causes adhesion issues and makes future removal harder.
Reclaimed Wood or Shiplap
Shiplap (real or MDF imitation) adds rustic texture. Real wood shiplap runs $2-6 per square foot depending on species and finish: MDF shiplap costs less but requires paint. Installation involves finding studs, cutting boards to length, and nailing in place, similar complexity to board and batten.
Reclaimed wood planks create even more texture variation but often need cleaning, sanding, and sealing before installation. Check for protruding nails or staples. Wear gloves and safety glasses during prep, old wood splinters aggressively.
Conclusion
Transforming a hallway endpoint doesn’t require demolition or professional designers. It requires intention, treating that terminal wall as an opportunity rather than an afterthought. Whether the approach involves a single statement mirror, a console table with task lighting, or a full accent wall with architectural molding, the goal remains consistent: give the eye somewhere purposeful to land. Measure carefully, mount securely, and don’t skip the prep work. The hallway will thank you every time someone walks through it.