
Old shutters aren’t just architectural salvage, they’re versatile statement pieces that add texture, history, and visual interest to any wall. Whether pulled from a renovation project, scavenged from a flea market, or repurposed from an old farmhouse, shutters bring instant character without the heavy lifting of custom millwork. They work in nearly every room, complement styles from coastal cottage to industrial loft, and require minimal tools to mount. Unlike mass-produced wall art, shutters offer genuine craftsmanship and the option to customize finishes, hardware, and styling to fit the space perfectly.
Key Takeaways
- Shutter wall decor adds architectural depth and texture to any space, with louvered slats that create dynamic shadows and dimension compared to flat wall art.
- Shutter wall decor works across diverse styles—from rustic farmhouse to modern minimalist—and can be easily customized with paint, stain, or seasonal embellishments.
- Mounting shutters requires minimal tools and DIY experience; most installations need only wood screws into wall studs, making them ideal for renters and hesitant decorators.
- Personalize shutters through photo displays, LED string lights, chalkboard inserts, or seasonal swaps to create functional, rotating decor that adapts to your changing needs.
- Authentic salvaged shutters from architectural salvage yards and estate sales cost $15–$60 each and offer genuine craftsmanship, durability, and patina that new reproductions cannot replicate.
- Shutters are moisture-resistant and suitable for bathrooms, mudrooms, and covered porches when properly sealed, unlike paper-based art that deteriorates in humid environments.
Why Shutters Make Perfect Statement Wall Decor
Shutters deliver architectural depth that flat art can’t match. The louvered slats create shadow lines that shift with natural light throughout the day, adding dimension to otherwise plain drywall. Most vintage shutters range from 36 to 72 inches tall and 12 to 18 inches wide, making them substantial enough to anchor a wall without overwhelming smaller rooms.
Their neutral base, usually wood or composite, takes paint, stain, or distressing techniques easily. A homeowner can swap out the finish seasonally or when redecorating, which isn’t possible with framed prints or canvas art. The slatted design also allows for creative layering: tucking greenery between louvers, clipping photos with mini clothespins, or threading string lights through the gaps.
From a practical standpoint, shutters are durable. Real wood shutters (pine, cedar, or poplar) withstand humidity better than paper-based art, making them suitable for bathrooms, mudrooms, or covered porches. They’re also forgiving for renters or hesitant DIYers, most installations require only two #8 wood screws into wall studs, and the holes are easy to patch when it’s time to move.
Rustic Farmhouse Shutter Display Ideas
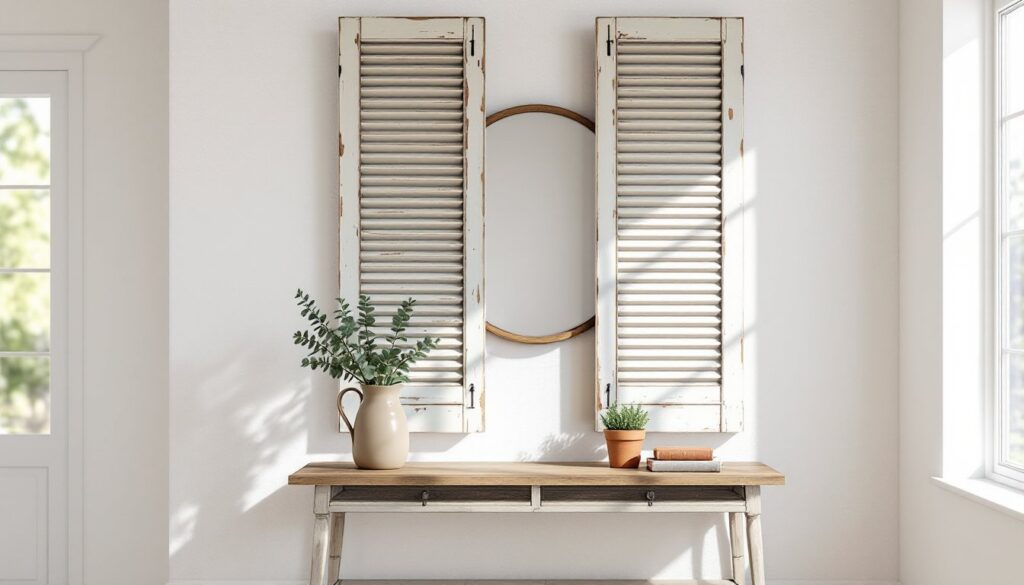
Farmhouse aesthetics lean heavily on reclaimed materials, and weathered shutters fit the brief perfectly. For a classic look, mount a pair of shutters vertically on either side of a large mirror or above a console table. Leave the original chippy paint intact, layers of white, cream, or barn red add authenticity that new distressing can’t replicate.
Another approach: arrange three to five shutters of varying heights horizontally across a long wall, like a gallery. Stagger them slightly rather than aligning tops or bottoms to avoid a rigid, institutional feel. This works especially well in dining rooms or entryways where the wall space is wide but ceiling height is standard (8 feet).
For functional decor, attach small hooks or knobs to the shutter frame to create a coat rack or jewelry organizer. Use 1-inch cup hooks screwed into the stiles (the vertical frame pieces) for hanging lightweight items like scarves, hats, or keys. Make sure the shutter is anchored into at least one stud: toggle bolts work for drywall-only sections, but won’t support heavy coats.
Pair shutters with other salvaged elements, galvanized metal signs, vintage bread boards, or mason jar sconces, but avoid overcrowding. Farmhouse style works best when each piece has breathing room.
Modern and Minimalist Shutter Wall Styling
Modern interiors benefit from shutters when they’re treated as sculptural objects rather than nostalgic tchotchkes. Start with clean-lined shutters, preferably flat-panel or board-and-batten styles instead of louvered. Paint them in a single matte or satin finish that matches or subtly contrasts with the wall color. Charcoal, soft gray, navy, or even black work well in contemporary spaces.
Mount a single shutter vertically as a focal point above a low-profile credenza or bed. Keep surrounding decor minimal: a single ceramic vase, a small potted succulent, or nothing at all. The shutter’s verticality draws the eye upward and adds height to rooms with standard ceilings.
For a bolder statement, paint shutters in a two-tone pattern, alternate slats in contrasting colors, or paint the frame one shade and the louvers another. This technique adds graphic interest without introducing new materials or textures.
Avoid fussy embellishments. No burlap bows, stenciled quotes, or artificial flowers. In modern settings, the shutter’s form and finish should do the talking. If adding greenery, choose real plants in simple pots, pothos, philodendron, or snake plants all tolerate indoor light and require minimal care.
Creative Ways to Personalize Your Shutter Decor
Shutters are ideal canvases for customization. Here are a few tested approaches:
Photo display: Clip family photos, postcards, or kids’ artwork to the louvers using small wooden clothespins or binder clips. This turns the shutter into a rotating gallery that’s easy to update. For a cleaner look, use thin picture-hanging wire strung horizontally across the shutter and attach photos with mini clips.
Chalkboard or corkboard inserts: Remove every other slat (they usually slide or pop out from the frame) and cut pieces of cork sheet or chalkboard contact paper to fit the openings. This creates a functional message board that still retains the shutter’s texture.
Stenciling and decals: Use painter’s tape to mask off sections of the shutter, then apply stenciled numbers, letters, or geometric patterns with acrylic craft paint. Seal with a matte topcoat if the shutter will be in a high-traffic area. Vinyl decals also work but may not adhere well to rough or heavily distressed surfaces.
Seasonal swaps: Attach a small wreath, garland, or ribbon to the top of the shutter with floral wire. Change it out for holidays or seasons, eucalyptus in spring, faux fall leaves in autumn, evergreen in winter. This keeps the base decor consistent while allowing easy updates.
Lighting: Thread battery-operated LED string lights through the louvers for ambient lighting in bedrooms or covered porches. Choose warm white for a cozy feel or cool white for a modern vibe. Make sure the battery pack is accessible for changes, tuck it behind the shutter or mount it to the back with adhesive Velcro.
Best Room Placements for Shutter Wall Art
Living rooms: Shutters work above sofas, mantels, or as part of a gallery wall. Scale matters, use taller shutters (60+ inches) in rooms with high ceilings, and shorter pairs (36 to 48 inches) in cozier spaces.
Bedrooms: Mount shutters as a headboard alternative, either as a single wide piece or a pair flanking the bed. This adds height and texture without the bulk of upholstered headboards. Ensure they’re secured well: use 3-inch wood screws into studs if mounting heavy or wide shutters.
Entryways and mudrooms: Shutters with hooks serve double duty as decor and storage. Position them near the door for coats, bags, or leashes. In narrow entryways, mount a single shutter vertically to avoid crowding the space.
Bathrooms: Shutters handle humidity better than canvas or paper art, making them suitable for powder rooms or master baths. Keep finishes sealed, use a satin or semi-gloss polyurethane on painted or stained shutters to resist moisture.
Outdoor spaces: On covered porches or patios, shutters add vertical interest to blank walls. Choose cedar or treated wood to resist rot, and apply an exterior-grade sealer. Avoid mounting shutters in full sun or areas exposed to rain, as UV and water will degrade finishes quickly.
How to Source and Prepare Shutters for Display
Sourcing: Architectural salvage yards, estate sales, and online marketplaces are prime hunting grounds. Expect to pay $15 to $60 per shutter depending on size, condition, and material. Reproductions are available at home decor retailers for similar pricing, though they lack the patina of genuine vintage pieces. Salvaged shutters may have old hardware, loose slats, or minor rot, factor in repair time.
Inspection: Check for structural soundness. Wiggle the frame joints: if they’re loose, reinforce with wood glue and clamps before hanging. Look for insect damage, especially in softer woods like pine. Small holes are cosmetic, but active infestations (sawdust, exit holes, live insects) require treatment with a borate-based wood preservative before bringing them indoors.
Cleaning: Brush off loose dirt and cobwebs with a stiff-bristle brush. For stubborn grime, scrub with a solution of warm water and a few drops of dish soap, then rinse and let dry completely. Avoid soaking: excess moisture can warp wood or loosen joinery.
Finishing: If painting, start with a bonding primer (especially over glossy or previously painted surfaces) to ensure the topcoat adheres. For a distressed look, apply two colors, base coat first, then a contrasting topcoat, and sand edges and high spots with 120-grit sandpaper after drying. Seal raw or painted wood with a clear topcoat (polyurethane, polycrylic, or paste wax) to protect against fingerprints and dust.
Mounting: Locate wall studs with a stud finder and mark them. For shutters under 10 pounds, use #8 or #10 wood screws driven directly into studs. Heavier or wider shutters may need D-ring hangers or keyhole brackets screwed into the back of the shutter frame, then hung on screws in the wall. Always use a level to ensure the shutter is plumb, wonky shutters are immediately noticeable. If studs aren’t where you need them, use heavy-duty toggle bolts rated for the shutter’s weight, but be aware they’re less secure than screws into solid wood.
Conclusion
Shutters offer a rare combination of texture, versatility, and authenticity that few other decor elements can match. Whether left weathered for rustic charm or refinished for a modern edge, they adapt to nearly any style and room. With basic tools, a little prep work, and thoughtful placement, shutters transform from salvaged scraps into statement pieces that feel both intentional and effortless.